Meyer’s Frog Tweak for Better Hookups
A simple, yet effective way to put more bass in the boat
Fall is here, and for a large chunk of the country that means it’s prime time for frogging. While frogging is easily one of the coolest ways to catch a bass, it can also be one of the most heartbreaking because hookups aren’t often guaranteed when a bass blasts a frog.
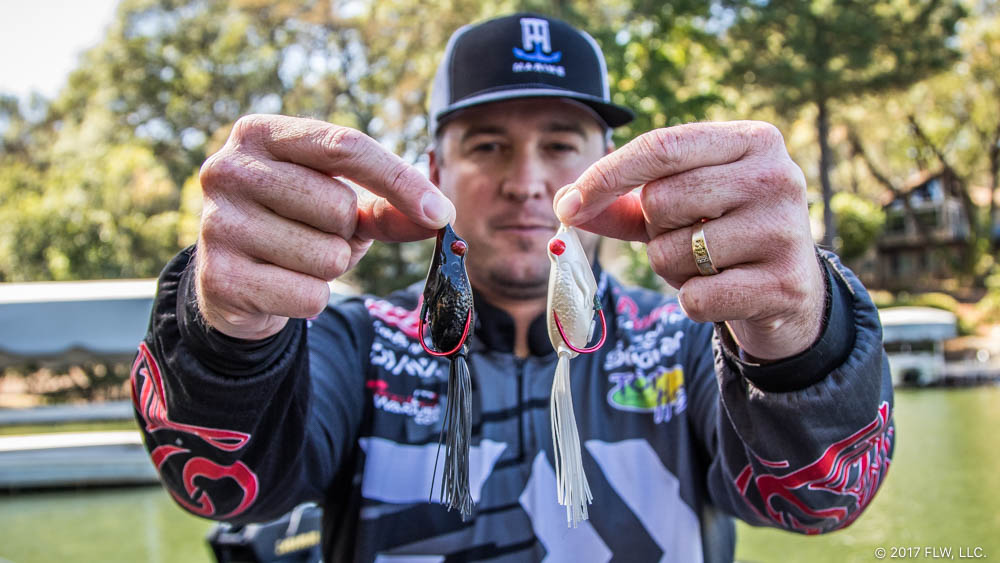
Cody Meyer understands that and offers a simple solution to help put more bass in the boat when putting Kermit to work.
“I love to throw a frog, but sometimes the hookup percentage just isn’t that good,” Meyer says. “I started thinking about it years ago, and if you look at stock hooks on a frog they are sometimes just not heavy enough. Aside from that the biggest issue, in my opinion, is that you can physically bend the hooks apart. When you set the hook on a frog fish with a heavy rod and 65-pound braid, something has got to give, and it’s going to be the hook.”
Meyer’s frog tip is actually a two-part process.
First, he swaps out the stock frog hook for a 6/0 Owner Double Frog Hook.
“I like to change the hook to a size bigger than recommended with the frog,” he says. “It sits the hook back farther on the frog and offers a little more bite than the stock hook.”
The second step is to help prevent the hooks from flexing.
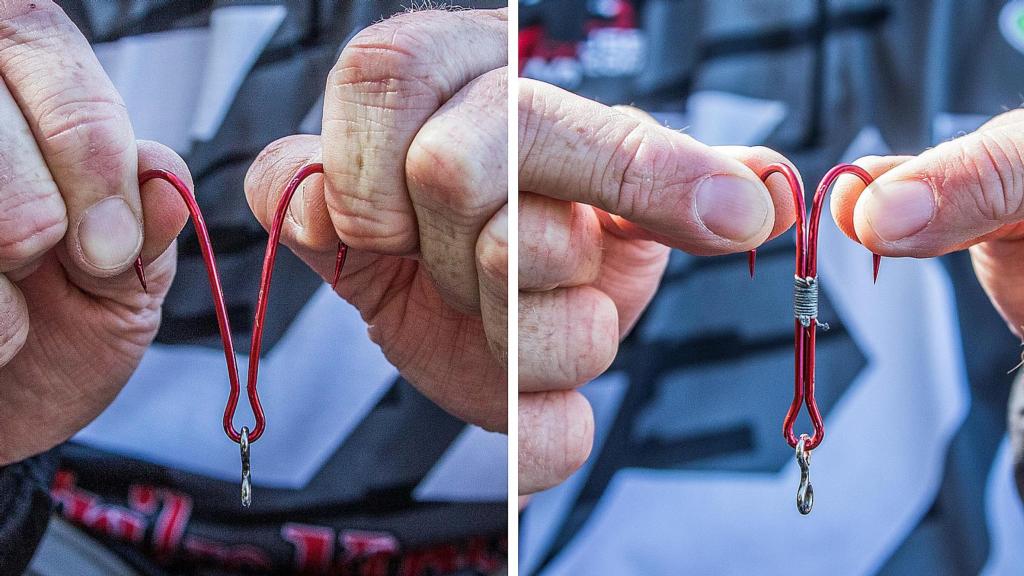
“The bigger thing I like to do in order to keep the hook from flexing no matter what hook it is involves tying the shanks together,” Meyer says. “I do this for all of my tournament frog hooks. It is super easy to do and will greatly increase your hookup ratio.”
This process can be done while the hook is attached to the frog, but Meyer suggests removing the hook first. Here’s how he goes about it:
Step 1 – Cut off a piece of braid from the rod you will be fishing with. About 8 to 12 inches will do just fine.
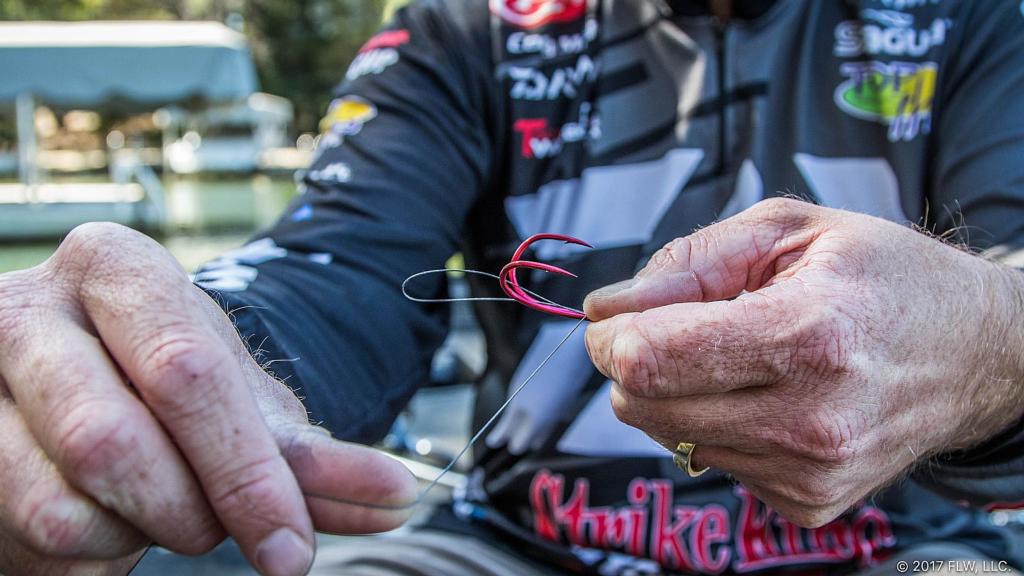
Step 2 – Lay the piece of line in between the two hook shanks, and fold the tag end near the bend of the hooks back up toward the line tie to create a loop.
Step 3 – Tightly wrap the tag end six to eight times around the hook shank and the line, working toward the end where the loop that was created.
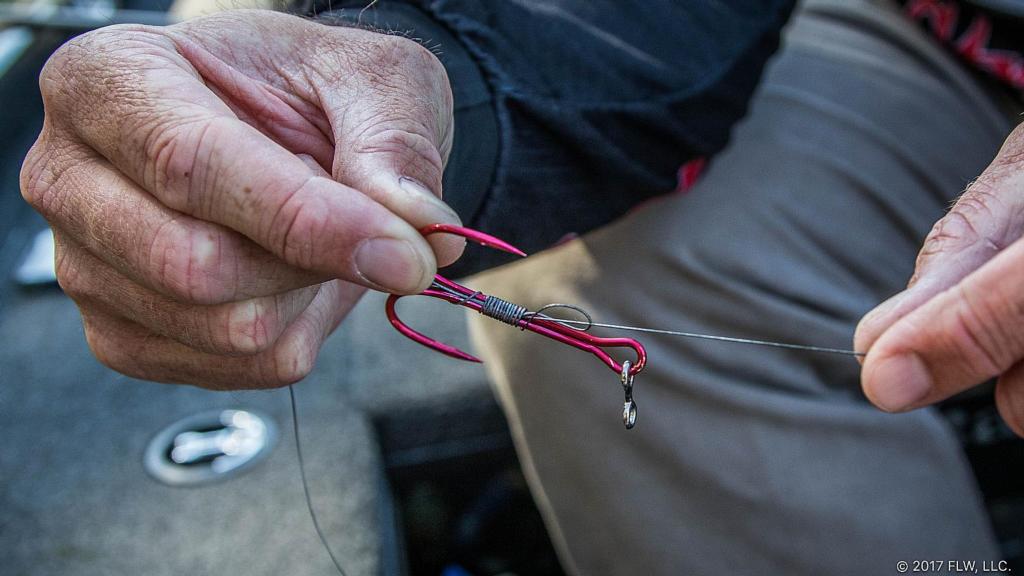
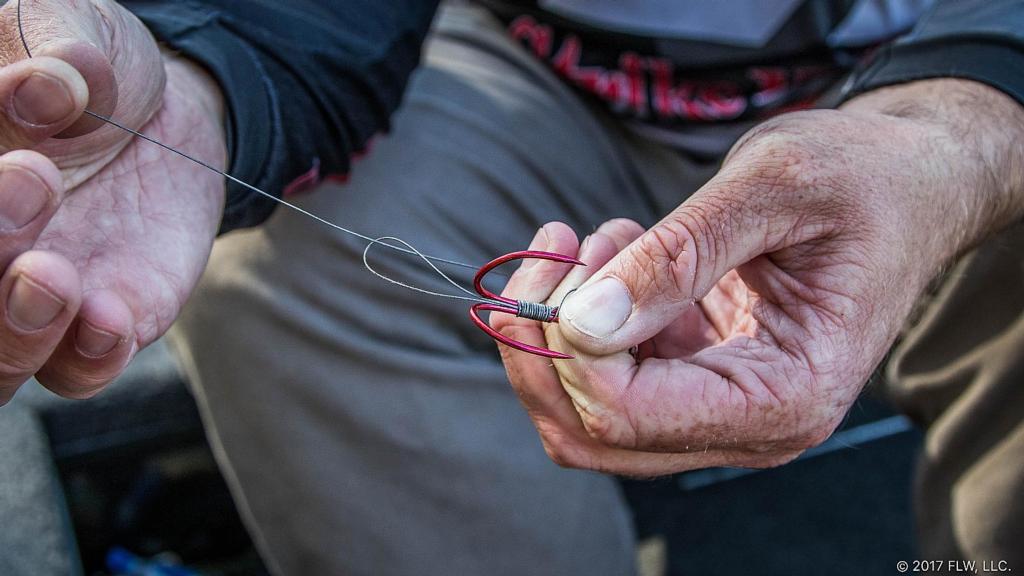
Step 4 – Once finished wrapping, put the tag end through the loop heading toward the bend of the hook and begin to pull. When the loop tightens up, alternate pulling on each tag end to secure the braid against the hook shank.
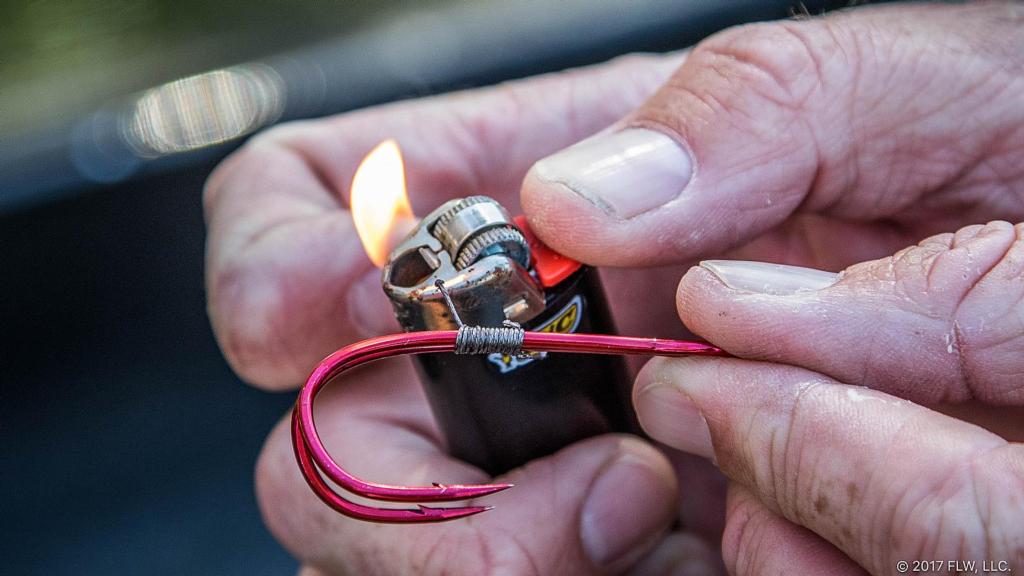

Step 5 – Cut the tag ends (not too short), and then use a lighter to burn the tags slightly. Meyer prefers to burn the edges because it helps prevent the tag ends from slipping into the knot, should they move.
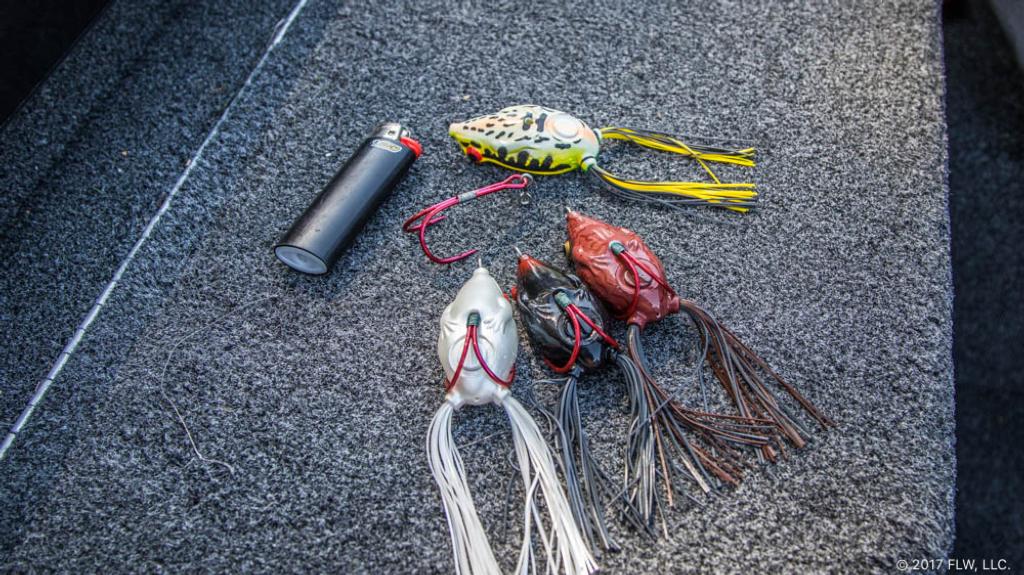
Step 6 – Place the hook back in the frog, tie it on and get to catching.
“I have been doing this for a while, and it is super simple and really helps keep more fish stuck when you hook them, especially at the end of a cast,” Meyer adds. “I’d say if you were only catching six out of 10 bass before, I’d bet that will go to catching eight or nine by tying your hooks together.”