Advanced Rod Repair: Replace a broken guide
(Editor's note: This article originally appeared in the July 2013 issue of FLW Bass Fishing magazine. To read more compelling articles from Bass Fishing magazine each month, become an FLW subscriber member.)
Eventually, your rod collection will grow to the point where it’s cost-effective for you to acquire the tools and learn the skills to make slightly advanced repairs, such as replacing a broken line guide. The task does require some special equipment, but if it keeps your favorite rod in the game without having to wait a couple of weeks for a local shop to fix it, the cost is worth the investment. And a few tools still cost less than replacing one of today’s specialized high-end rods. You might also consider going together with a fishing buddy to split the cost. Here’s what you need to replace a broken guide, along with how to do it.
Prepping
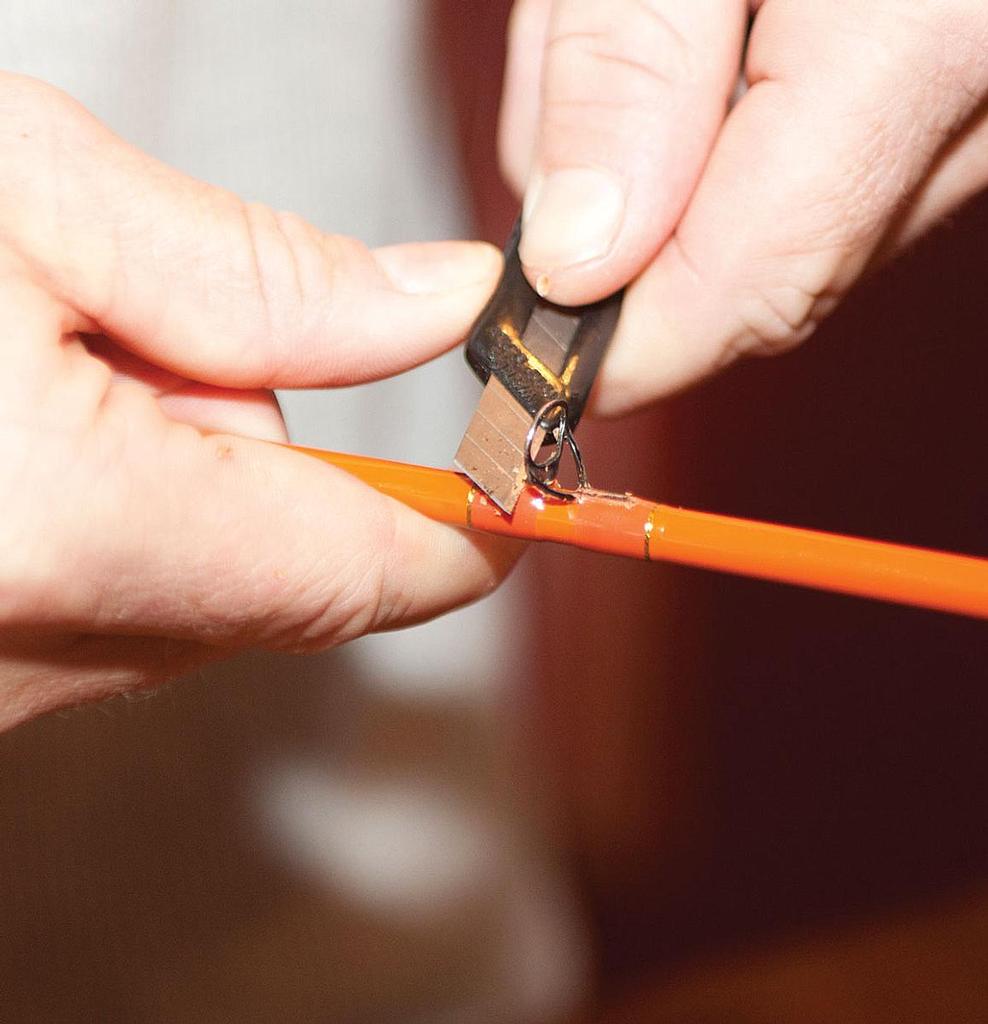
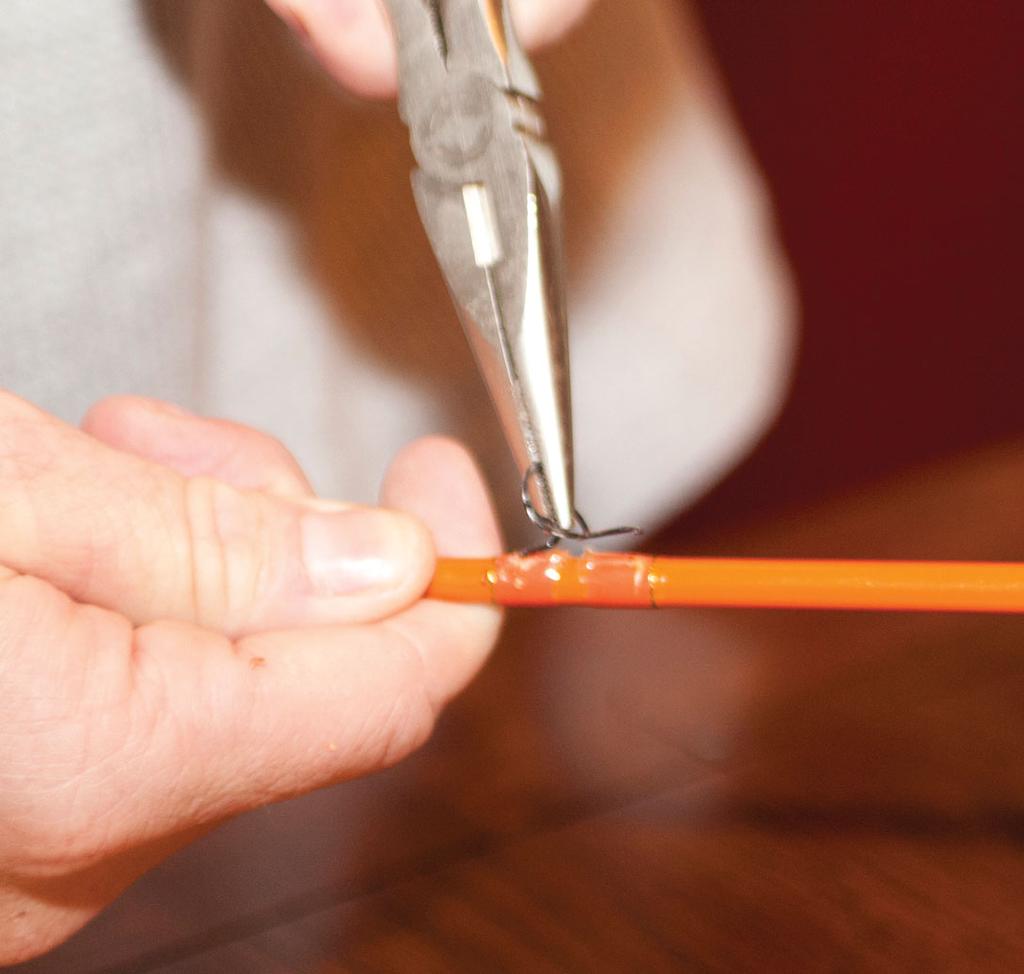
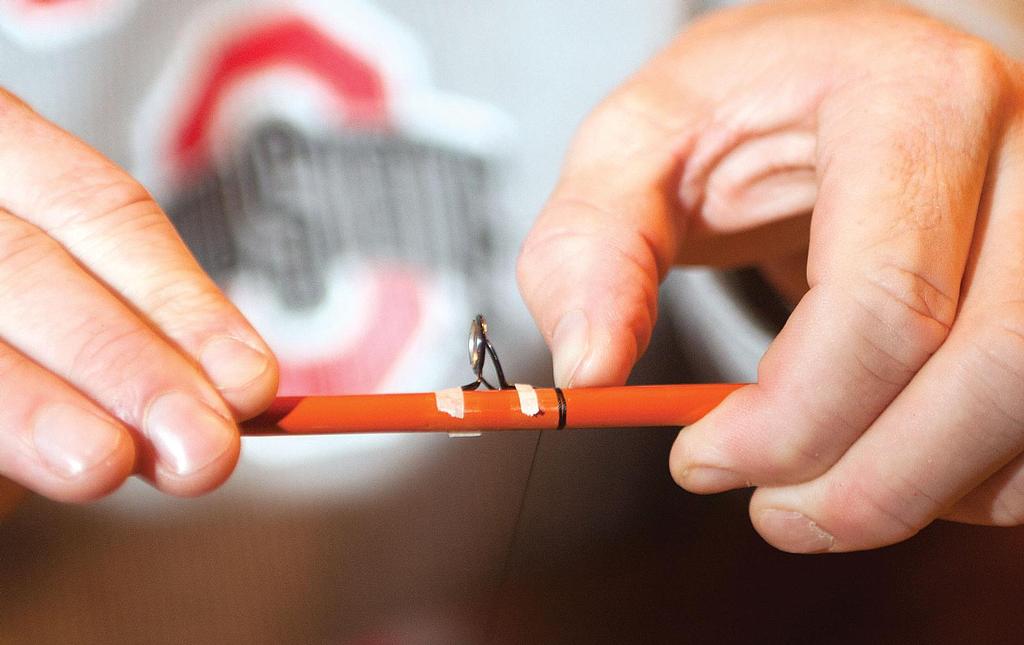
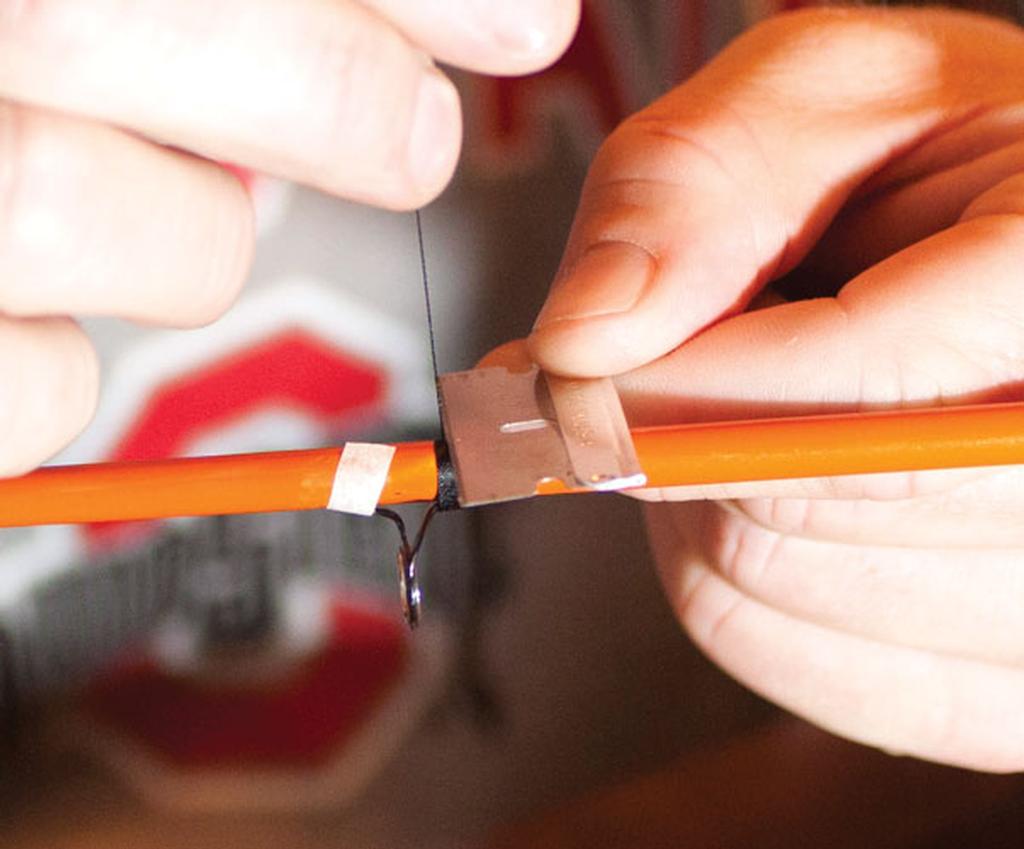
Use a very sharp razor blade to cut away the threads that hold the damaged guide to the rod (1). Avoid cutting into the blank by scraping the blade across the top of the guide foot to start the thread removal. Once the guide foot (or feet) are nearly free, use pliers to remove the guide from the remaining wrap and rod finish carefully (2). Use the razor blade to remove excess glue and thread wraps. Take it slow and be careful; this delicate process needs to be done without digging into the blank or removing the blank’s finish.
Wrapping
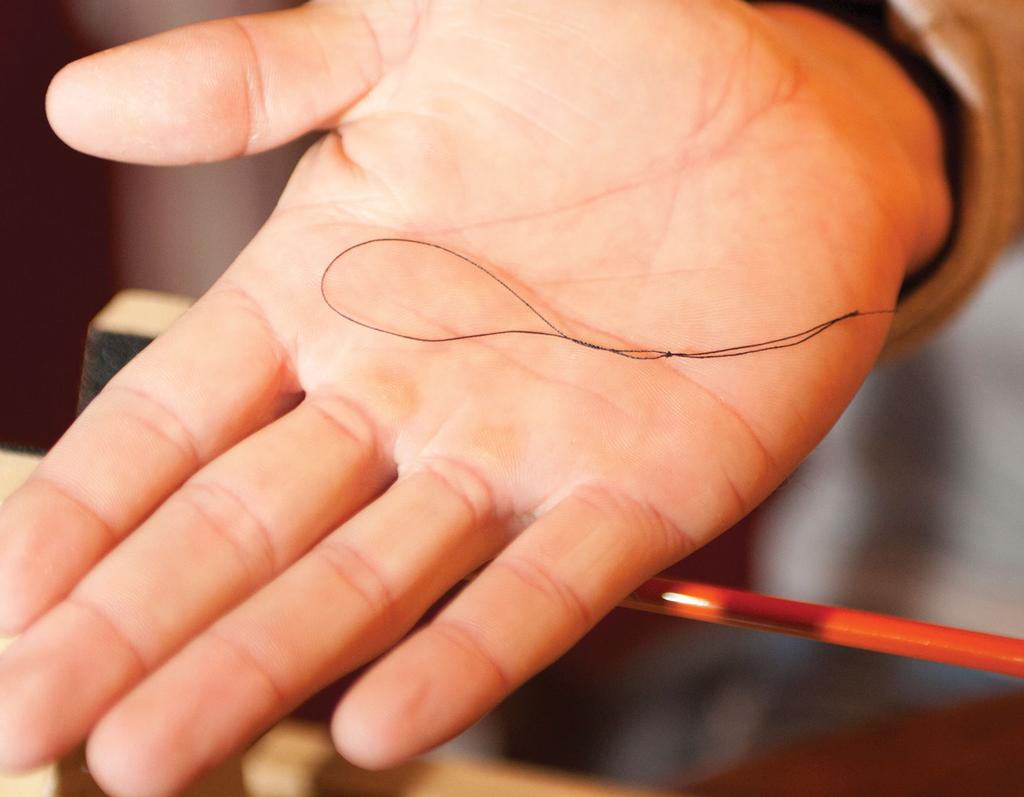
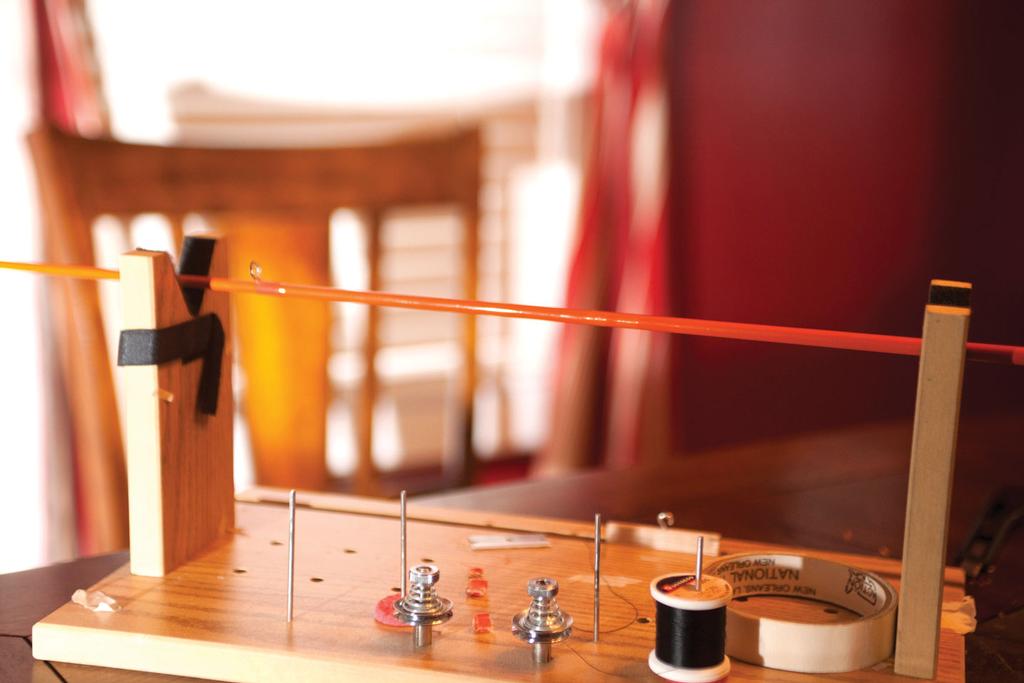
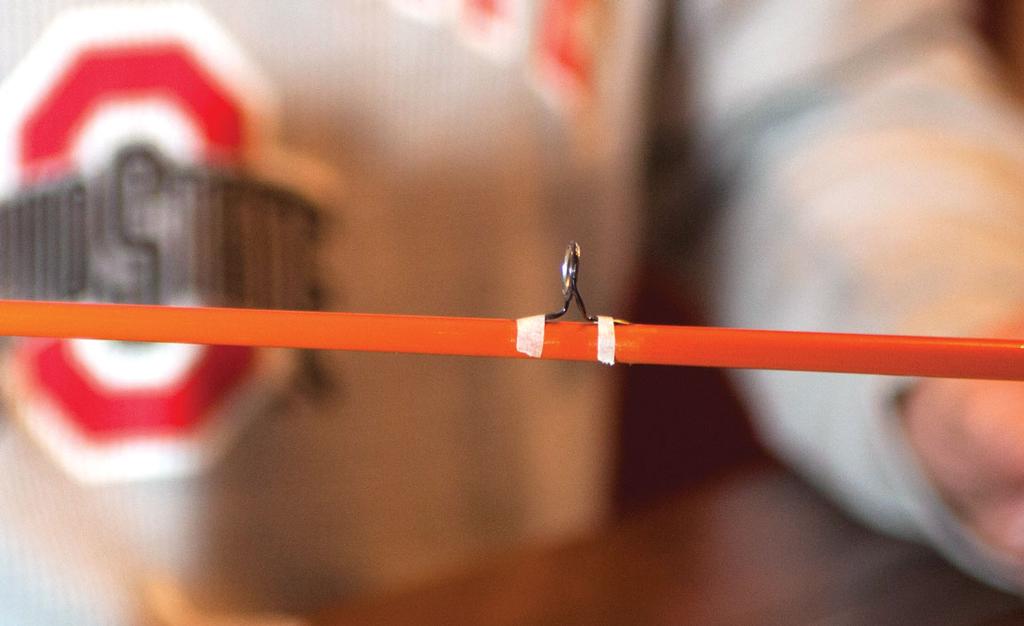
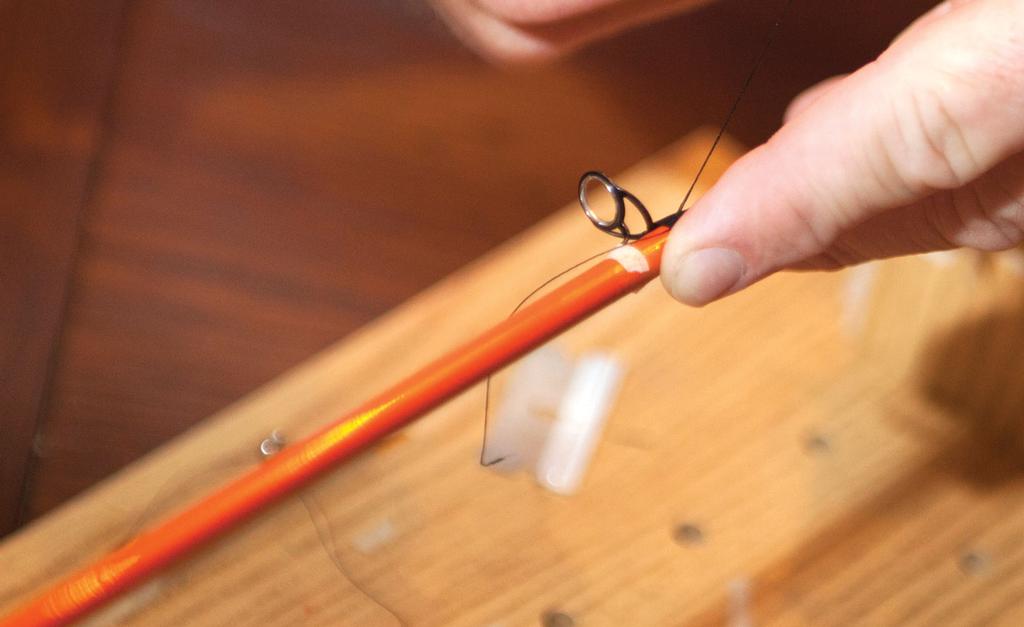
Before beginning, form a loop in a 6-inch piece of wrapping thread and connect the tag ends with an overhand knot (3). You’ll need this later to finish the wrap. Place the rod in the rod-wrapping station. Tape the new guide’s feet to the blank with narrow strips of tape (4). Check to make sure the guide is straight, and adjust as necessary. Minor tweaks can be made later, but get it as close as possible to start. You’ll wrap the rod with Size A thread. Pull the thread over the blank beside the guide foot. Pull about 3 to 4 inches past the blank.
Wrap this tag end around the blank to the opposite side of the thread from the guide, then cross back over the first wrap toward the guide foot, which is the direction you’ll be wrapping (5). Now turn the rod several times. When set up in the wrapping station, the rotating rod will pull thread from the spool. Use this process to begin wrapping thread up the guide foot.
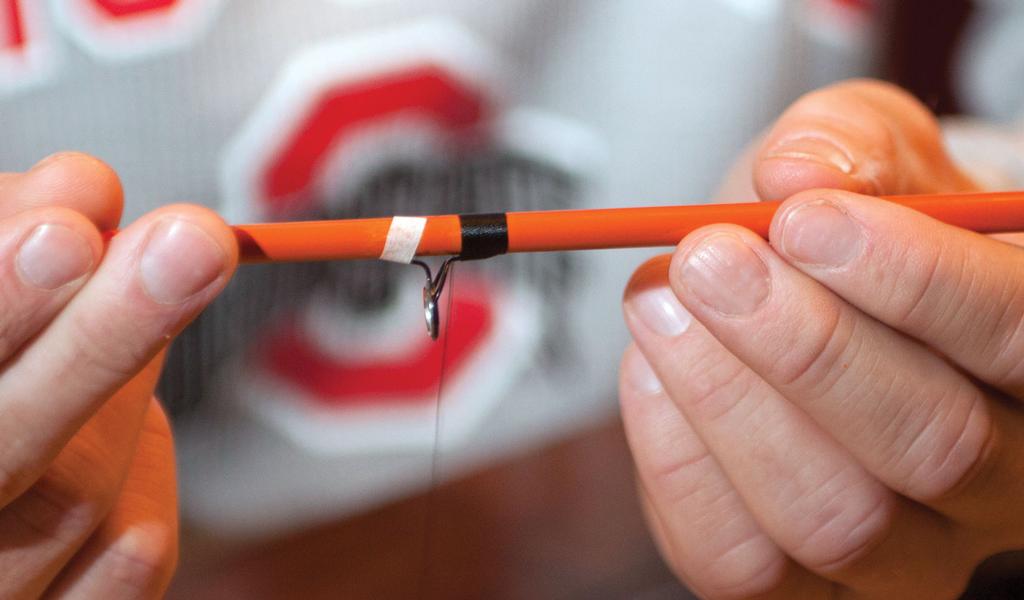
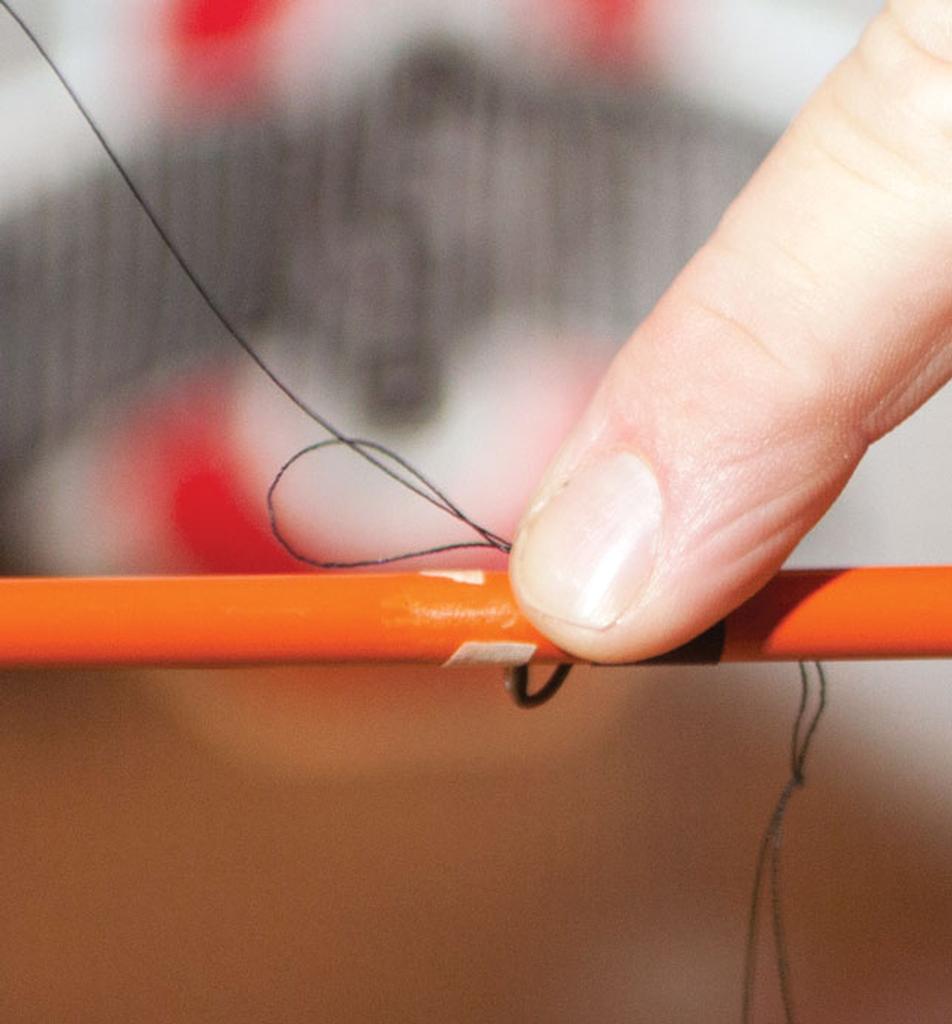
Each wrap should go across the tag end, which will secure it and keep the thread from unraveling. After making a few wraps, pull the tag end up perpendicular to the blank and trim it extremely close with a sharp razor blade. Continue wrapping up the guide foot, but stop about three or four wraps from the guide (6). Keep the wraps clean, straight and tight. Grab the loop you made at the beginning of the prepping process. Lay it on the blank and perpendicular across the wraps, with the loop pointed toward the direction you are wrapping the foot. Finish the last few wraps directly over this loop (7). Put your finger on top of the wrap to hold it in place, and cut the thread free, leaving a tag end. With pressure still on the wrap, put the cut tag end of your wrapping line through the loop, then use your other hand to pull the loop – and the tag end with it – back through the last few wraps toward the direction where you started.
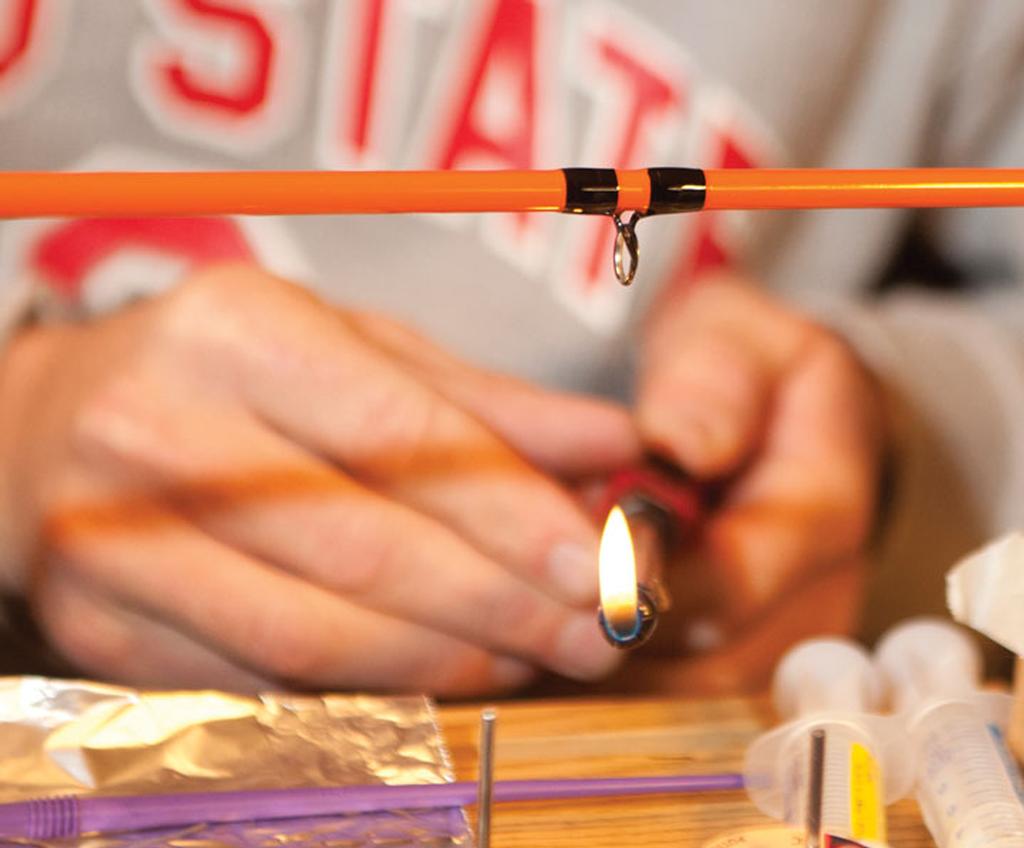
These wraps will hold the tag end in place. Hold the tag end up and perpendicular to the blank, and trim it as close as possible. Use a stick style lighter to singe away any loose threads, being careful not to get the flame too close to the wraps. It is very important to singe these loose threads or slight burs because once the rod finish has cured, they will harden and can damage your fishing line. Repeat the process on the other foot, if the guide has one.
Finish
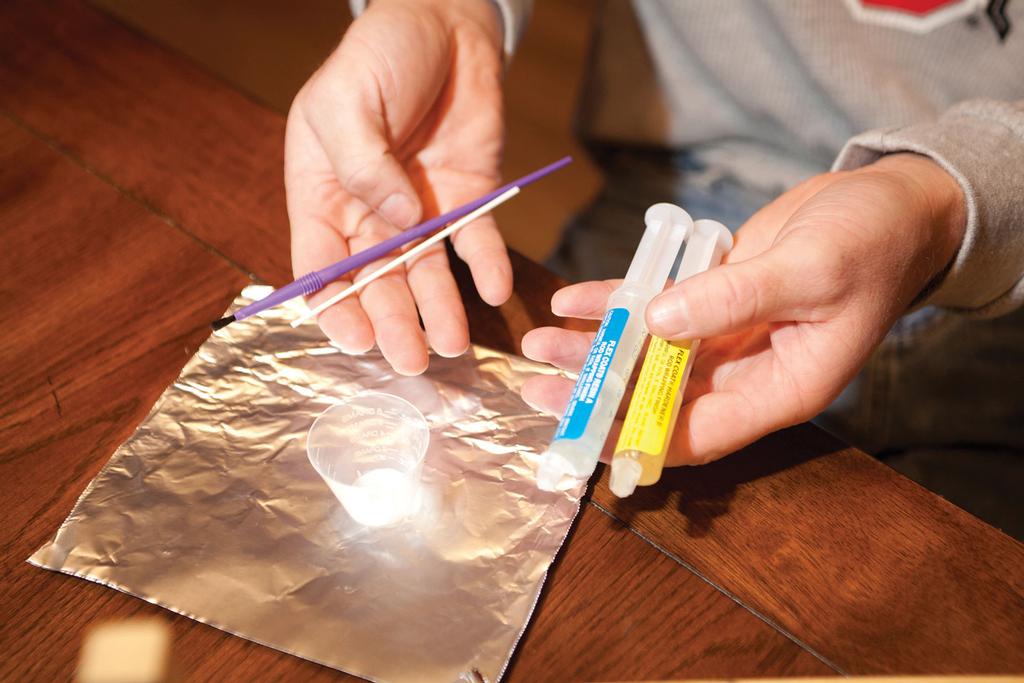
The wrapping process should be finished with a two-part, flexible rod-specific finish such as Flex Coat. Regular epoxy will work in a pinch, but it will yellow and crack over time. Even though you will have some waste, always mix at least 2 to 3 cc of finish to make sure you get equal parts of resin and hardener. Being off will result in a tacky finish, and the problem is exaggerated if you try to mix too little to begin with. Thoroughly mix the two parts in a small plastic cup. Then pour the mixture onto a piece of foil, which reacts with the finish and causes the air bubbles to “float out” (8).
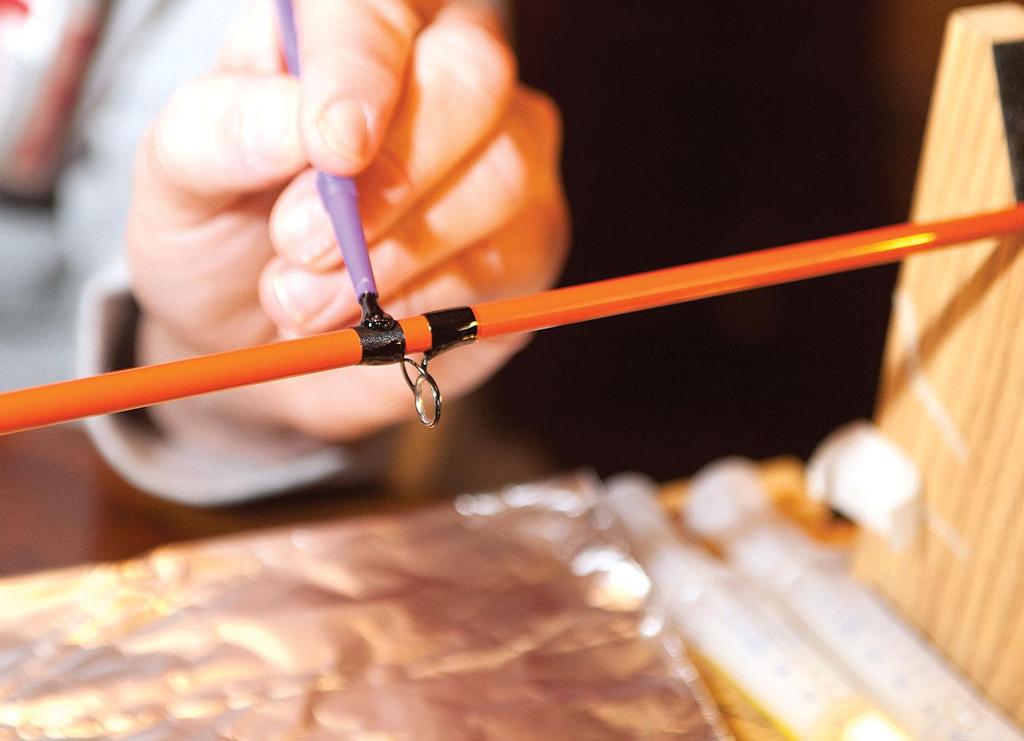
“Paint” the finish on the threads sparingly with a brush. It’s easier to add finish than remove it, so use just enough to cover the threads.
Once the threads are covered, apply a bit more finish over the edges of the wrap and onto the blank to seal the “edge” of the threads fully. Allow the finish to soak into the threads before moving on. Smooth out any large globs of finish with the brush. Applying a bit of heat with a lighter will soften the coating enough to help remove any air bubbles and smooth the finish. Just don’t get the flame too terribly close (9). Use a drying motor or, in a pinch, turn on your favorite fishing shows and manually rotate the rod for a few hours to help the finish dry evenly. Let dry overnight before handling.
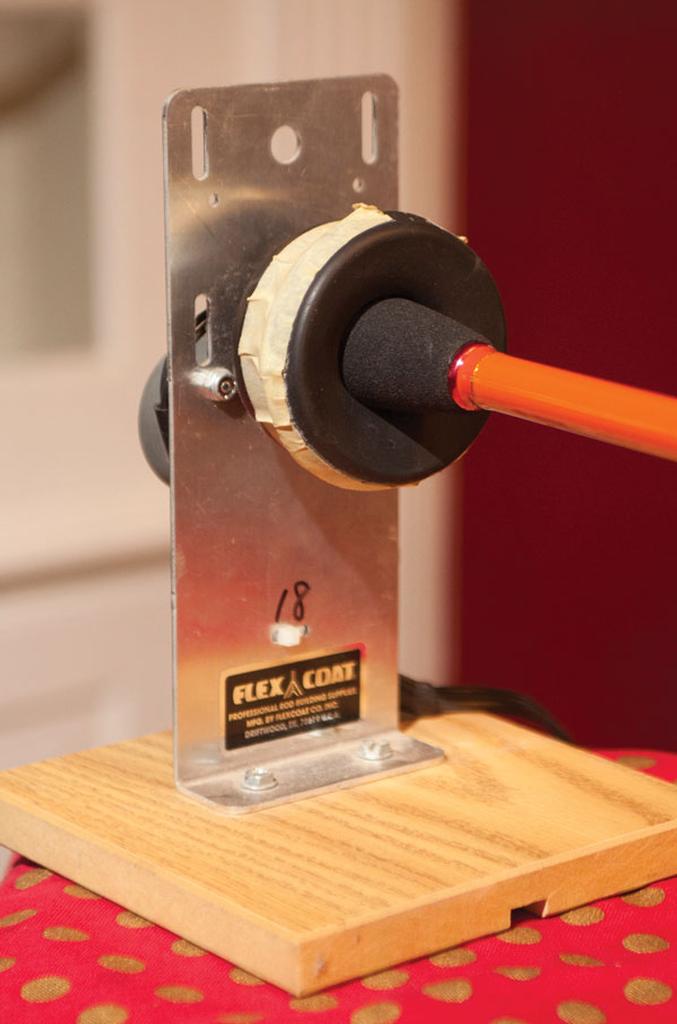
Options For Rod-Wrapping Stations
Companies such as Flex Coat (flexcoat.com) offer rod-wrapping stations that range from simple clamp-on holders to reasonably priced do-it-yourself models up to professional-grade equipment for high-volume production. A rod-wrapping station is a good investment for the serious angler. That said, all you really need is something to hold the rod while you turn it and wrap the threads. Something as simple as a cardboard box with two V-shaped notches cut in its top edge will work in a pinch. The other feature of a commercial rod-wrapping station is a line tensioner, which keeps the thread tight as you wrap for a clean finish without overrunning the spool. If you’re going the cardboard box route, you can run the thread through the middle of a thick phone book. It’ll provide enough tension to do a reasonable job.
Drying Motors
A commercial drying motor (available from Flex Coat, flexcoat.com; Batson Enterprises, batsonenterprises.com; American Tackle Company, americantackle.us) will present the biggest expense for a DIY rod repairman. The motor rotates the rod continuously so the somewhat thick, slow-drying Flex Coat doesn’t run or pool to one side. You could turn a rod by hand for a few hours to keep the finish even while drying, but who wants to do that? The drying motor can be set and left alone overnight for a perfect finish. You might consider pairing up with a friend to buy a motor. Or if you want to build your own rods eventually, have a group of friends each buy a motor and then share them for drying several rods at once. Also, a drying motor has other applications for crafty anglers that might make the purchase more practical. For instance, it can be used to dry epoxy finish coats on homemade crankbaits or for drying custom-painted lures and jigs. Necessity being the mother of reinvention, resourceful anglers also have found ways to convert old rotisserie cookers, toaster ovens and even electric drills into drying units.