Jigs at home
A guide to making your own jigs for fishing, hobby or profit
“Just break it off,” my fishing partner said. I cringed at the thought of losing another $3 skirted jig. We were fishing a gnarled rock pile with stumps and root wads, and it was a jig-eating monster. But it held some bruiser bass, and sometimes that’s the price to pay for quality fish. You have to be willing to part with a bait or two, but after losing 10 jigs between the two of us, I began to wonder how many jigs I go through in a year. Thirty? Fifty? Maybe more.
That just wasn’t going to work anymore. Many anglers have probably faced the same questions while fishing. If they have a favorite lure to fish, and they fish with it more than all their other lures combined, chances are they have lost more of them than they care to remember. Is there an alternative to buying 100 jigs a year? Absolutely. Depending on your approach, it might or might not be more cost effective than just buying the jigs from the store and saving yourself the time and hassle.
But if you’re like me, jig making is as much a hobby as it is something to save a few pennies on my bigger hobby – fishing. For me, there is something relaxing about pouring leadheads, hand-painting them and tying skirts in confidence-building colors I can’t find elsewhere.
In a sport filled with anglers prided on having that “secret” hot bait, the truth is there are no secret baits anymore, unless they have them custom built or painted. If someone, somewhere sold it to you, chances are he sold it to someone else, and the secret is out. So if you want a jig to build your own personal confidence that no one else will have, then making them at home is an endeavor worth investigating.
Forewarning
Lead can be an extremely dangerous material. It’s known to cause birth defects and should be dealt with carefully. Lead contamination in air, in dust and on your skin is invisible. Risk can be reduced with strong ventilation, washing hands immediately after use of these products and before eating, and careful cleaning of surfaces and floors after lead dust has a chance to settle. Keep children and pregnant women away during use and until cleanup is complete.
Having said that, it is also very easy to work with if you’re careful and take precautions. The first thing needed is ample space to work. That doesn’t mean just a corner in the garage. It needs to have airflow and be well-ventilated. If the garage has a side door, as well as the main door, then a fan will provide sufficient air flow.
Always wear gloves and long pants when pouring lead. There is a tendency to splatter lead or drip it when pouring, and molten lead is not something you want on your bare skin.
What you need
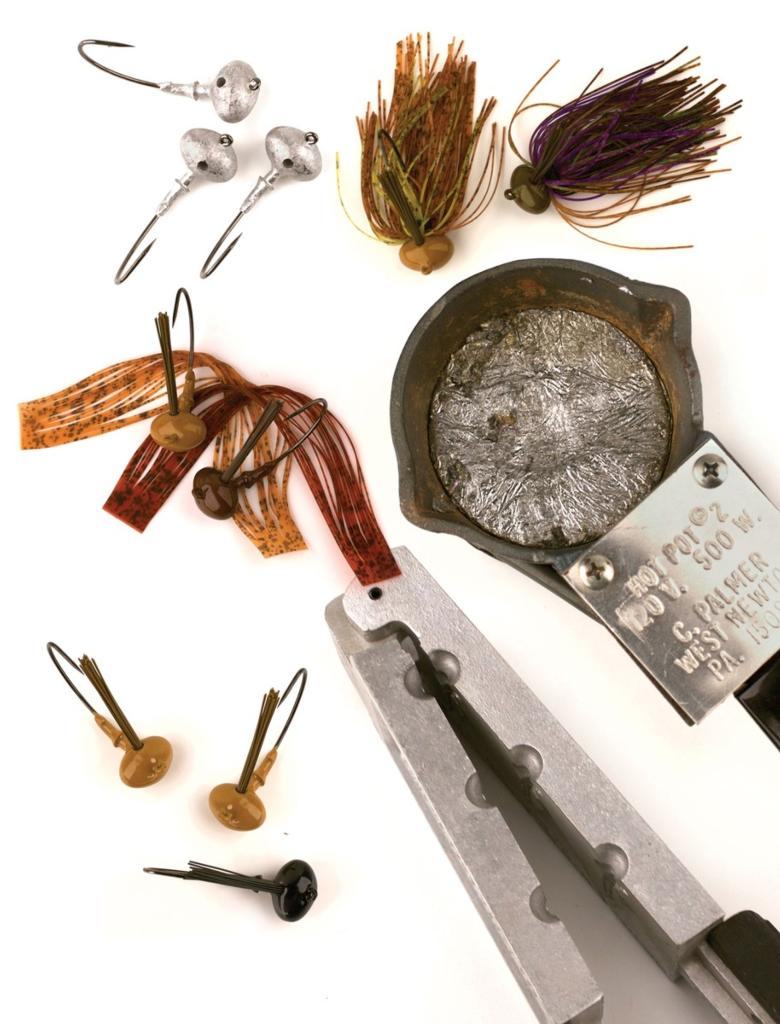
The main components needed to get started pouring and making jigs are lead, hooks, a pot for melting, a ladle, a mold, weedguards or base pins, and a rack or a pan to hold cooling jigs. Lead is a widely recycled material. It can be found at scrap-metal dealers or salvaged-metal shops. Also, tackle shops that carry molds usually carry lead strips for melting. Other sources are wheel weights off automobiles, but because this is a much harder lead, it should be mixed with softer leads made for plumbing, 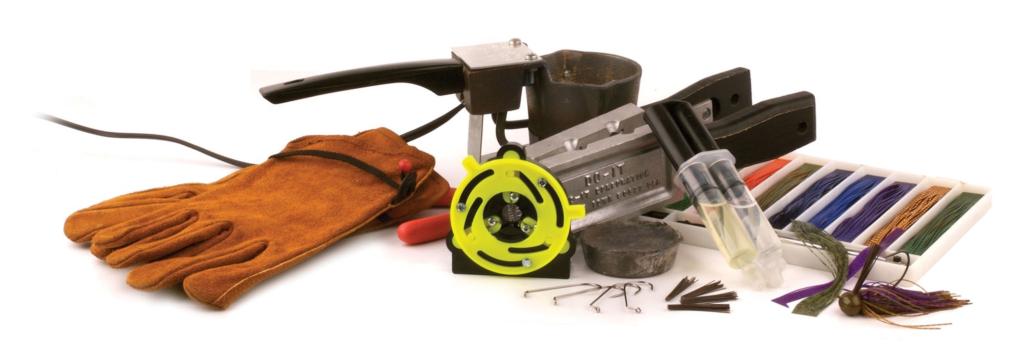 sheathing and flashing. Hard lead is much more difficult to cast and harder on the molds themselves. But lead wheel weights are easy to obtain from local auto repair shops and junkyards.
For molds, the Do-It brand of molds (do-itmolds.com) is the big name in the business. They have a wide selection of shapes and styles and even offer blank molds that can be customized at machine and tooling shops. Many pro fishermen have Do-It molds in their shops and carry them in their trucks when they travel.
The pouring phase
Once all the supplies are gathered, begin melting the lead in the pot. If undecided on which pot to get, a Lee Precision Melter (leeprecision.com) is a good low-end melting pot that can melt 4 pounds of lead in 15 minutes. A Palmer Hot Pot 2 is also a great starting pot, as it is a pot and a ladle all in one. Both pots retail for around $40, but an additional ladle is required for the Precision Melter. There are also bottom-pouring pots that are a bit more expensive, but can add a little ease to the pouring process. I prefer the old-fashioned ladle-and-pot arrangement.
A good trick is to open the mold and put it near the pot as it heats the lead. A mold works much more smoothly when it is warm. Keep a slotted stainless-steel spoon or fork nearby for removing impurities, referred to as slag, from the melting lead.
After the lead is melted, place the hook and fiberguard into the mold and close it. A base-hole pin takes the place of a weedguard. It keeps lead from filling in the jighead so it can be powder-painted and cured without melting the weedguard.
Next, set the mold on its side on a flat and sturdy surface. Slowly pour the lead into the cavity with the hook and weedguard. This will take some time to perfect, so expect to pour too much lead a few times. The key to a good pour is pouring it fast enough to fill the cavity quickly, but not so fast that excess lead spills on the outside of the mold.
If lead does spill into the joints of the mold, be careful to remove it before opening the mold, as this might damage the hinges on the mold, and it won’t pour correctly after that. Once the mold is open, grab the 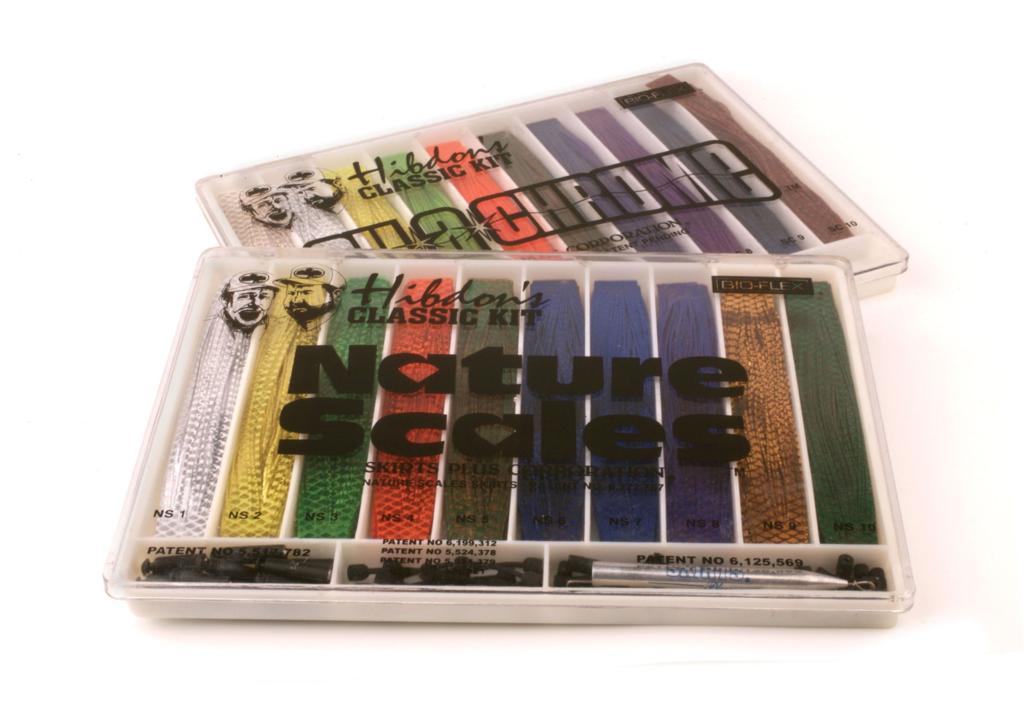 jig by the hook. It should only take a few seconds for the lead to be hard enough to open the mold and separate it. Using a pair of gate shears, cut the excess lead, called sprue, away from the jighead. From there, put the cooling leadheads into an aluminum baking pan or hang them on a rack for painting later.
With practice, pouring 100 jigs an hour is achievable.
The painting phase
This piece of the equation is where making jigs becomes unique to the angler. The fastest and most widely accepted manner of painting bass jigs is powder painting. Basically, get a good powder paint like Component Systems Inc. Pro-Tec Powder Paints (csipaint.com) and go through the heating, dipping and curing process for a chip-proof finish.
To get started, find a retailer near you that carries the powder paints you want. Brown, pumpkin brown, watermelon and black are all staples for bass jigs. Next, a heat source is required to heat your lead so the paint will melt and adhere. Some people use a lighter, but a small propane torch works better.
Prep the paint to get an even adhesion. With the lid screwed on, shake the canister of paint vigorously upside down. Then gently turn it over and unscrew the lid. The loose, fluffy powder will be right on top and easier for dipping jigs.
Secure your torch to your workbench and light it. Holding the hook with hemostats, rotate your jigheads (without weedguards) above the flame for several seconds. The time you heat your jigs varies depending on size. If heated too long, the jighead will smoke when dipped into the paint. If not heated long enough, the paint will still look like powder just resting on the head. If you do it just right, the paint melts and has a nice, glossy finish to it. When swishing the jighead through the paint, keep it moving and shake off excess while pulling it out. Don’t force the jig into packed powder; it will clump and be uneven. It should swish through easily if done correctly. A little powder paint goes a long way.
Hang the jigs on a rack. A suitable rack can be fashioned out of dowel rods and two 6-inch squares of one-by-six lumber. Drill holes through the squares the same diameter as the dowel rods on a diagonal row, leaving sufficient room on the bottom hole to let a jig hang and not touch the bench.
After painting the jigs, the most important step in the process is to cure the paint. Basically, the paint is baked to a rock-hard enamel finish. CSI can recommend temperatures and baking times for various color paints on their Web site. A $30 toaster oven from Wal-Mart works as a perfect heat source for baking jigs. This oven should only be used for jigs and never for cooking food.
Hang the jigs by their hooks, cure and let cool before removing. The final step is to glue in weedguards. There are various sizes of weedguards, but the key is to match the fiberguard to the mold. Some require 1/8-inch weedguards, and some require 5/32-inch weedguards. Be sure to get the right ones. Next, mix up a little Devcon epoxy in a plastic cup and dip the formed end of the weedguard into it. Force the weedguard into the hole and hang the jigs back up on a rack for the epoxy to set. Again, experiment until you get the right amount to hold the weedguard in place without leaving a glob of glue on the head of the jig.
Put on a skirt
Skirting jigs probably shows the most creativity from the jig maker. There are literally thousands of 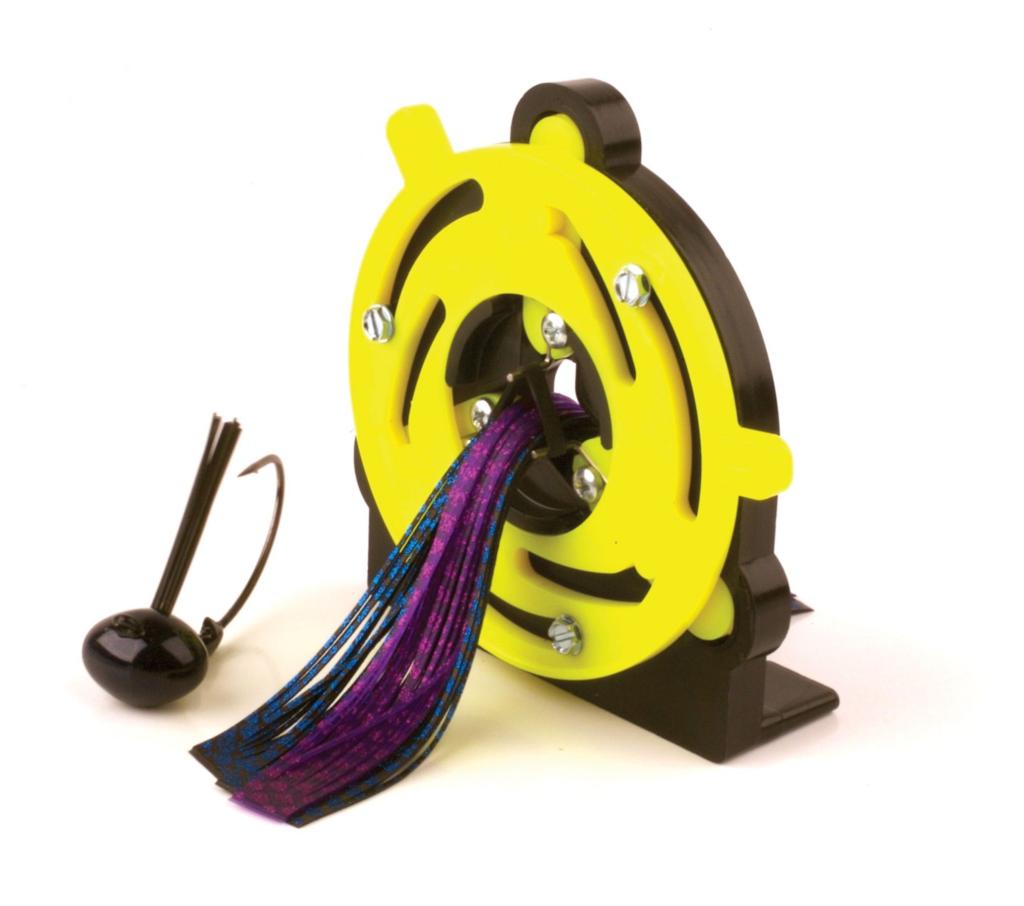 colors and styles of silicone and rubber skirting material available to anglers. Even if making jigs is too tedious for some, tying custom skirts is a breeze. All you need are skirt pads, rubber collars, scissors and a tool to thread the pads through the rubber collars. The latter is something of personal preference, but a new tool is just hitting the market that anyone can use. The Naked Bait Company has a tool called the Skirt Expander (nakedbaitco.com). Basically, all one has to do is slide the collar onto the metal pegs, push the tab over, and the collar expands in a triangle shape so the pads can be slid through with ease. It’s so simple, it can be done one-handed.
Pads are available from many retailers. Skirts Plus (skirtsplus.com) makes nice kits that come with collars, pads, rattles and a tube skirt tool. My personal favorite is the Hibdon’s Classic Kit Nature’s Edge series. It has several brown and green hues for making very lifelike crayfish imitations. Other retailers include Living Rubber Company (livingrubber.com), Jann’s Net Craft (jannsnetcraft.com) and Barlow’s Tackle (barlowstackle.com).
Take the skirt pads – three for thicker skirts and two for more breathable skirts – and thread them through the collar using whichever tool you choose, and then cut the ends of the pads off to make your skirt. If the collar is placed a little past the middle of the skirt, take the longer end of the skirt and fold it back so you can thread it onto the jig with the skirt flared back. Once it’s on the jig, trim the skirt to your desired length, and you’re ready to fish.
Serious fishermen typically like to tinker. They are never satisfied with anything right out of the box. There is just something special about catching a fish on something made by your own hands that is hard to explain. I’m not much of a fly fisherman, but I assume it is the same reward a fly tier feels when he catches a big trout on a fly he hand-tied. And losing that 11th jig that cost me a dollar to make is a little easier to swallow.